
 Shadowbox is a web-based media viewer application that supports all of the web's most popular media publishing formats. Shadowbox is written entirely in JavaScript and CSS and is highly customizable. Using Shadowbox, one can showcase a wide assortment of media in all major browsers without navigating users away from the linking page.

Steps to Add it to Blogger:
1.Login to the Blogger account.
2. Now Go to Design > Edit HTML.

Now search for the </body> tag and paste the following code just Above/Before it.

3.Now search for the </head> tag and paste the following code just Above/Before it.
<link href="http://dl.dropbox.com/u/27675057/ShadowBox/shadowbox.css" rel="stylesheet" type="text/css"></link>
<script src="http://dl.dropbox.com/u/27675057/ShadowBox/shadowbox.js" type="text/javascript">
</script>
<script src="http://dl.dropbox.com/u/27675057/ShadowBox/demo.js" type="text/javascript">
</script>
Now search for the </body> tag and paste the following code just Above/Before it.
</script>
<script type="text/javascript">
Shadowbox.init({ overlayOpacity: 0.8 }, setupDemos);
</script>
setupDemos is defined in demo.js2.Go to the Post/Page you want to add the Shadowbox and go to Edit HTML tab .

3.Now copy the code from below and paste it there.
<link href="http://dl.dropbox.com/u/27675057/ShadowBox/shadowbox.css" rel="stylesheet" type="text/css"></link>
<script src="http://dl.dropbox.com/u/27675057/ShadowBox/shadowbox.js" type="text/javascript">
</script>
<script src="http://dl.dropbox.com/u/27675057/ShadowBox/demo.js" type="text/javascript">
</script>
<script type="text/javascript">
Shadowbox.init({ overlayOpacity: 0.8 }, setupDemos);
</script>
setupDemos is defined in demo.js
4.Now for adding the images into Shadowbox Firstly add the image normally using Insert Image button
Now When you see the code in the edit HTMLwindow it would be something like this
| <a href=" large3.jpg"=""><img border="0" height="90" src="/small3.jpg" width="120" /></a> |
Make it like this
| <a href=" " rel="shadowbox" ><img src=" " /></a> |
As you can see we added only a rel="shadowbox".
For adding Gallery the code is
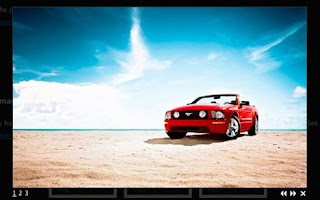
<a class="mustang-gallery" href="http://dl.dropbox.com/u/27675057/red.jpg"><img alt="Red Mustang" class="border" src="http://shadowbox-js.com/gallery/mustang/red-thumb.jpg" /></a>
<a class="mustang-gallery" href="http://dl.dropbox.com/u/27675057/blue.jpg" title="Blue Mustang"><img alt="Blue Mustang" class="border" src="http://shadowbox-js.com/gallery/mustang/blue-thumb.jpg" /></a>
But the Gallery will not function as Shadowbox is not aware of the attributes of the gallery , therefore we have to define the attributes in a js file separately (In this demo that file is demo.js) which then has to called from within Shadowbox.Init()
<script type="text/javascript">
function setupDemos() {

    Shadowbox.setup("a.mustang-gallery", {
        gallery:        "mustang",
        continuous:     true,
        counterType:    "skip"
    });
}
</script>
<script type="text/javascript">
Shadowbox.init({}, setupDemos);
</script>
Here are Some Examples followed by the demo.js for the specific elements
Single <a href="http://shadowbox-js.com/gallery/tiger.jpg" rel="shadowbox"><img alt="Tiger" class="border" src="http://shadowbox-js.com/gallery/tiger-thumb.jpg" /></a> Gallery <a class="mustang-gallery" href="http://dl.dropbox.com/u/27675057/red.jpg"><img alt="Red Mustang" class="border" src="http://shadowbox-js.com/gallery/mustang/red-thumb.jpg" /></a> <a class="mustang-gallery" href="http://dl.dropbox.com/u/27675057/blue.jpg" title="Blue Mustang"><img alt="Blue Mustang" class="border" src="http://shadowbox-js.com/gallery/mustang/blue-thumb.jpg" /></a> <a class="mustang-gallery" href="http://dl.dropbox.com/u/27675057/grey.jpg"><img alt="Grey Mustang" class="border" src="http://shadowbox-js.com/gallery/mustang/grey-thumb.jpg" /></a> SWF <a href="http://shadowbox-js.com/gallery/skip.swf" rel="shadowbox;width=400;height=300" title="Girl Skipping"><img alt="" class="border" src="http://shadowbox-js.com/gallery/skip-thumb.gif" /></a> Gallery SWF <a class="swf-gallery" href="http://shadowbox-js.com/gallery/caveman.swf" rel="width=520;height=390" title="Caveman"><img alt="" class="border" src="http://shadowbox-js.com/gallery/caveman-thumb.gif" /></a> <a class="swf-gallery hidden" href="http://shadowbox-js.com/gallery/old_man.swf" rel="width=600;height=450" title="Hollywood or Bust"><img alt="" class="border" src="http://shadowbox-js.com/gallery/caveman-thumb.gif" /></a> <a class="swf-gallery hidden" href="http://shadowbox-js.com/gallery/skip.swf" rel="width=400;height=300" title="Girl Skipping"><img alt="" class="border" src="http://shadowbox-js.com/gallery/caveman-thumb.gif" /></a> YouTube Video <a rel="shadowbox;width=405;height=340;player=swf" title="Ebon Coast" href="http://www.youtube.com/v/lSnWhsmlGec&hl=en&fs=1&rel=0&autoplay=1"><img src="http://shadowbox-js.com/gallery/mckee-thumb.jpg" alt="" class="border"></a> QuickTime <a rel="shadowbox;width=480;height=204" title="The Dark Knight" href="http://trailers.apple.com/movies/wb/the_dark_knight/the_dark_knight-tlr2_h.480.mov"><img src="http://shadowbox-js.com/gallery/darkknight-thumb.jpg" alt="" class="border"></a> Yahoo! Video <a title="Sweetness" href="http://d.yimg.com/static.video.yahoo.com/yep/YV_YEP.swf?ver=2.2.40"><img src="http://shadowbox-js.com/gallery/sweetness-thumb.jpg" alt="" class="border"></a> Vimeo <a title="The Last Eggtion Hero" href="http://vimeo.com/moogaloop.swf"><img src="http://shadowbox-js.com/gallery/eggtion-thumb.jpg" alt="" class="border"></a> Google Video <a title="While My Ukulele Gently Weeps" href="http://video.google.com/googleplayer.swf"><img src="http://shadowbox-js.com/gallery/ukulele-thumb.jpg" alt="" class="border"></a> Flash Video <a rel="shadowbox;width=600;height=450" title="Alien" href="http://dl.dropbox.com/u/27675057/alien.flv"><img src="http://shadowbox-js.com/gallery/alien-thumb.gif" alt="" class="border"></a>
demo.js
// This file is only required to run some of the demos.

function setupDemos() {

    Shadowbox.setup("a.mustang-gallery", {
        gallery:        "mustang",
        continuous:     true,
        counterType:    "skip"
    });

    Shadowbox.setup("a.swf-gallery", {
        gallery:    "swf",
        continuous: true
    });

    Shadowbox.setup('a[title="Sweetness"]', {
        width: 512,
        height: 322,
        flashVars: {
            id:         "v2155043",
            vid:        "2021599",
            autoPlay:   1
        },
        flashParams: {
            AllowScriptAccess: "always",
            allowFullScreen: "true"
        }
    });

    Shadowbox.setup('a[title="The Last Eggtion Hero"]', {
        height:     360,
        width:      640,
        flashVars:  {
            clip_id:    "1893986",
            autoplay:   "1"
        }
    });

    Shadowbox.setup('a[title="While My Ukulele Gently Weeps"]', {
        height:     327,
        width:      400,
        flashVars:  {
            docid:    "1352016870638076087",
            autoplay: "1"
        }
    });


}
5.Now save the Post/Page and see the magic.
Note: Please Host all the files on free hosting service like DropBox or Blogspot itself !
Another Important thing to note is that all the images used in this tutorial like Next button ,Previous button ,etc are all hosted on Google Code service which are the fastest and most reliable servers on the internet with the least downtime.So you can easily implement this with no hassles for Image Hosting.
Another Important thing to note is that all the images used in this tutorial like Next button ,Previous button ,etc are all hosted on Google Code service which are the fastest and most reliable servers on the internet with the least downtime.So you can easily implement this with no hassles for Image Hosting.
step four makes no fucking sense. so no it didn't work.