

Web fonts have been around since the CSS2 specification came out ,but in the recent years there has been a huge adoption due to lots of services coming up to cater to the users needs. One of the first on the scene was Typekit and was followed by lots of others. But they were all paid services and hence out of reach of the many ,then came Google Web Fonts and rest is history. Not only was it free but being hosted at Google's servers it was the most reliable of them all. In this tutorial we will learn how to embed Google Web Fonts in Blogger .
Getting started
There are mainly two ways to embed Google Web Fonts into your blog , firstly you can simply use the Template Designer or you can include the specific font related Style-sheet directly to your template .
Using the Template Designer
Video Tutorial
Steps
1. In your Blogger Dashboard ,go to the Template page of the specific blog

2. Click the Customise button present just adjacent to the Edit HTML button

3. In the Template Designer , go to the Advanced Tab and you are now free to select the fonts for the various parts of your blog like Page Text , Blog Title ,etc

Cons
- You don't have access to all the fonts present in the Google Web Fonts Directory. Only a selected few are included in the Blogger's Template Designer
- An extra bit of JavaScript is added which is way more than the simple stylesheet added in the other method
<script type="text/javascript">
if (navigator.userAgent.indexOf('MSIE 6') == -1) {
  WebFontConfig = {
    google: { families: [ 'Pacifico' ],
    api: 'http://themes.googleusercontent.com/fonts/css?kit=YwEG9hvZkp55xA2jQoejfg'
    },
    loading: function() {
      if (window.jstiming) window.jstiming.load.tick('webfontLoading');
    },
    active: function() {
      if (window.jstiming) window.jstiming.load.tick('webfontActive');
    }
  };
  (function() {
    var wf = document.createElement('script');
    wf.src = '//ajax.googleapis.com/ajax/libs/webfont/1/webfont.js';
    wf.type = 'text/javascript';
    wf.async = 'true';
    var s = document.getElementsByTagName('script')[0];
    s.parentNode.insertBefore(wf, s);
  })();
} else {
  document.documentElement.className = 'wf-inactive';
}
</script>
-This might not work if you are using a highly customized template the reason being the template designer would have removed the necessary CSS variables required for this to work. If you facing this problem then follow the other method below
Pros
- Simple to implement
- Surprisingly faster than the other method even though extra JavaScript is added
The Style-Sheet method
This requires a bit of fiddling with the Edit HTML of the Blog but is the cleaner of the two. I suggest that you follow this method
Video Tutorial
Steps
1. Go to Google Web Fonts and browse through the various fonts . Once you have selected which font to use , click the Quick Use Button just in the right hand side.

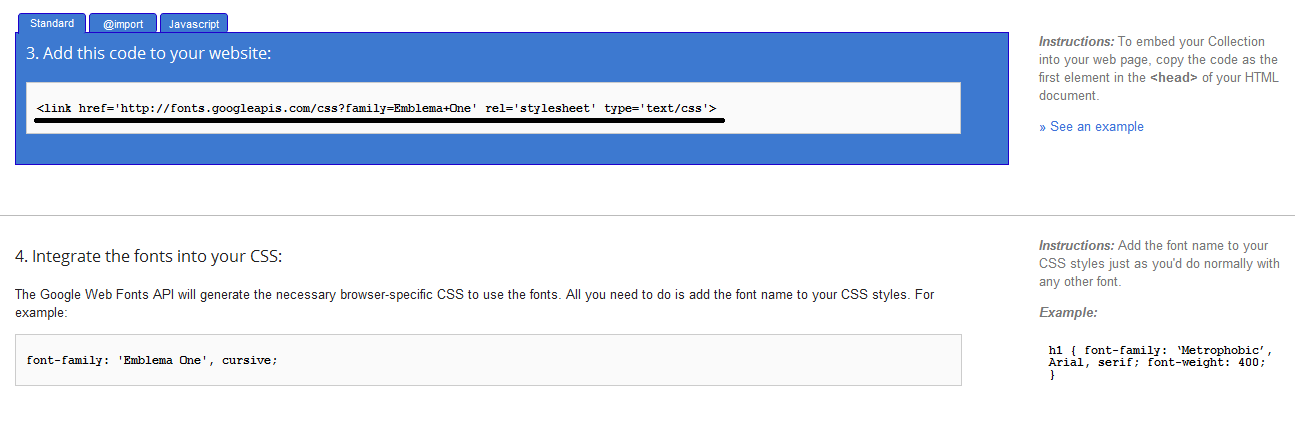
2. Now scroll down a bit and you will see a link tag code , copy this code
3. Now in the Blogger Dashboard ,go to the Template page of the specific blog
4. Click the Edit HTML button present just adjacent to the Customise button

5. Paste the code you copied just after the <head> tag

6. Now to add the CSS to use this font, just before the ]]></b:skin> tag
 h1 {
font-family: THE-WEB-FONT-FAMILY-NAME-YOU-EMBED ;
}
Embedding fonts is now a easy task, just don't overdo it, can have some negative effects Feel free to ask problems or questions related to this tutorial in the comments below
oh. its good info
Hello Prayag,
The latest tutorial is the best tutorial I have seen on whole of internet. The tutorial is nicely compiled. It is covering all the steps in detail.
The best part of the tutorial is the Video, which is very helpful to the newbies, who are damn afraid to open the Edit HTML section.
Keep Up Your Good Work.
iTeching.info
I've a got a personal blog at blogger and this is a useful tutorial. I've been struggling on fonts, now I got a new resource. Thanks a lot!
love your post...keep it up...
Regards,
proBloggerstricks
That was really an awesome tutorial. One of my cleint was asking me to get Google Fonts for his Blogspot blog and this article made my work easier :-)
Awesome guide thanks
I watched your video, and it changed the header... but what code do I use to change the body? :/ Help is MUCH appreciated!! Thank you
Shauna
To change the font of body text ,
In the Advanced option select the Page Text option
Nice bro thanks for your post
How To Bacame A Problogger ? - Tips Blogger
Hi Prayag, thank you so much. My blogger header title has been giving me headache. I was wondering however, if this workaround would affect my current blog traffic or ranking? Thank you
It Really Works for my Website Developers. Thanks for the tips
Hi, thanks for the tutorial. I want to know, can I use more than one font this way. and will this increase page loading time of my blog?
Hi, the tips are very useful and the easiest so far among all that I can find on the net, just one small problem, the font did not changed. No error msg popped out so I'm not sure where it gone wrong. Do help. Thanks
The script adds ONE of the families
google: { families: [ 'Pacifico' ],
How to add all families or at least more than one by using the script ?
Waow.. this is very nica info
thanks guys. .
In the first method, where exactly do you place the script in the html?
And do you have to specify the extra fonts you want to use or does this script give access to all google web fonts?